Tag Archives: sewing

Make your own Monpe pants!

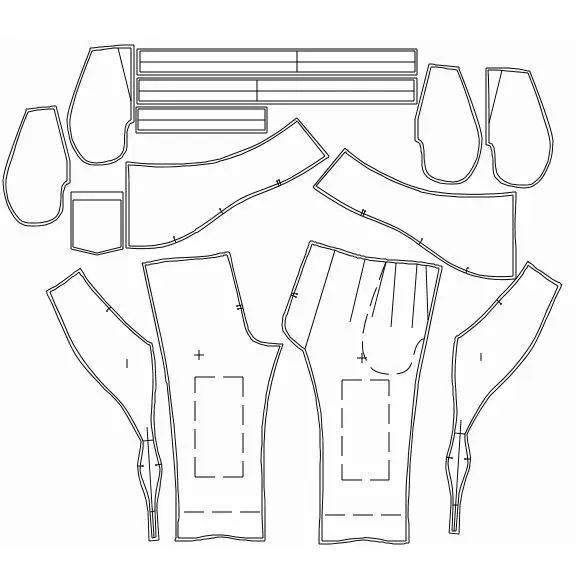
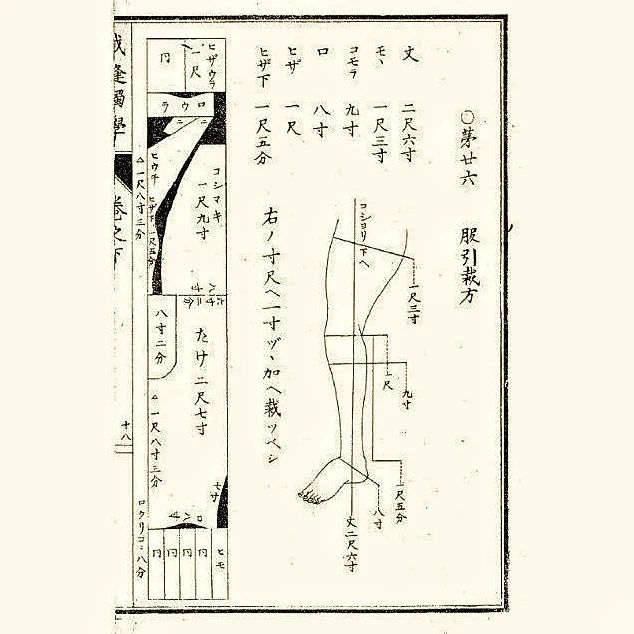
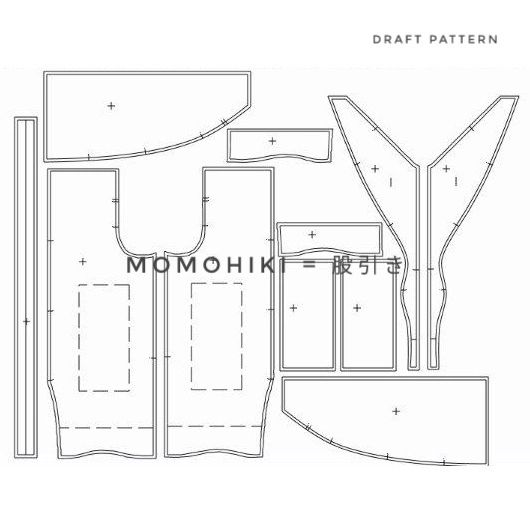
This is the Monpe pants pattern which I digitised based on a sewing book published in 1934.
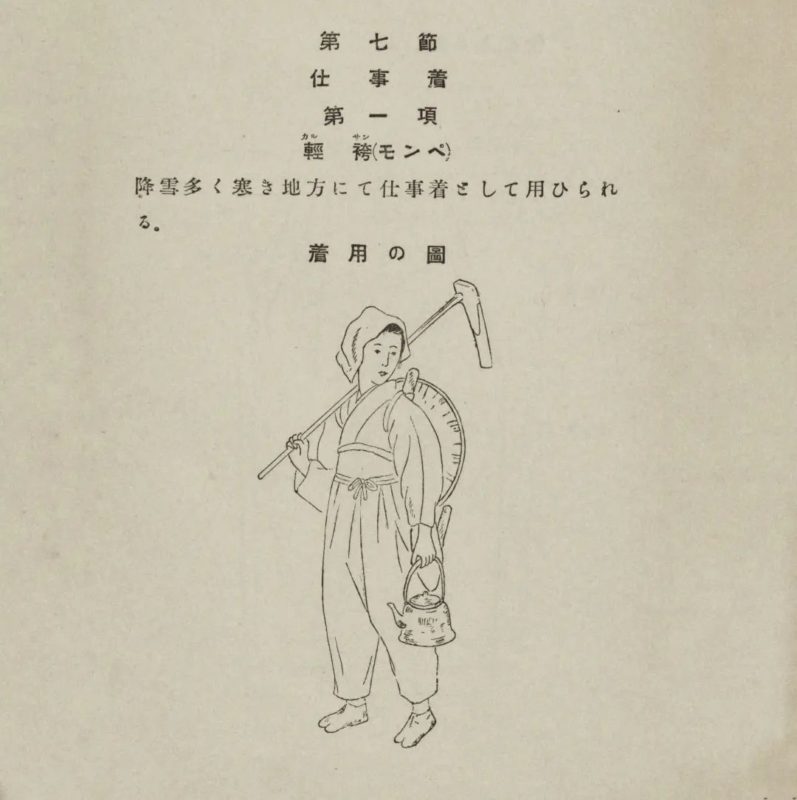
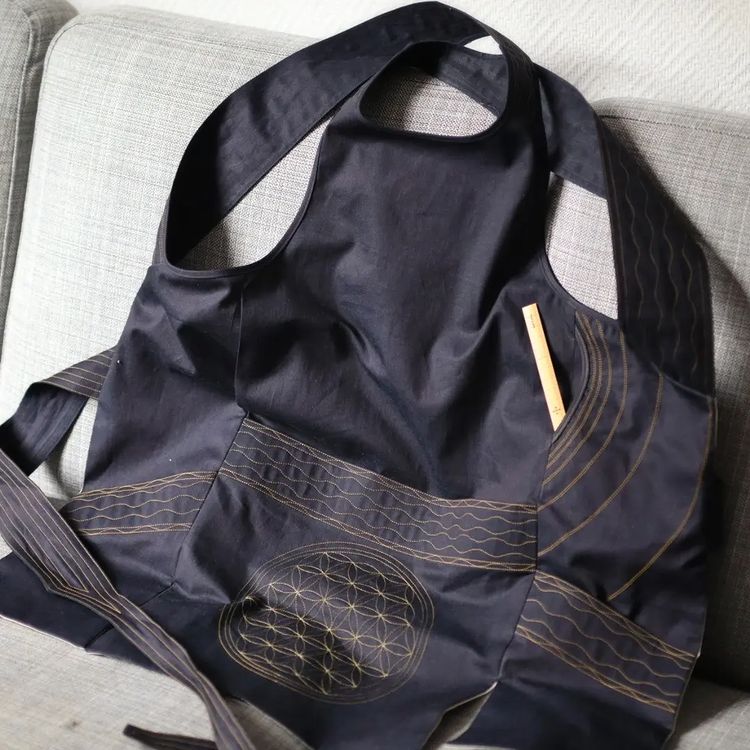
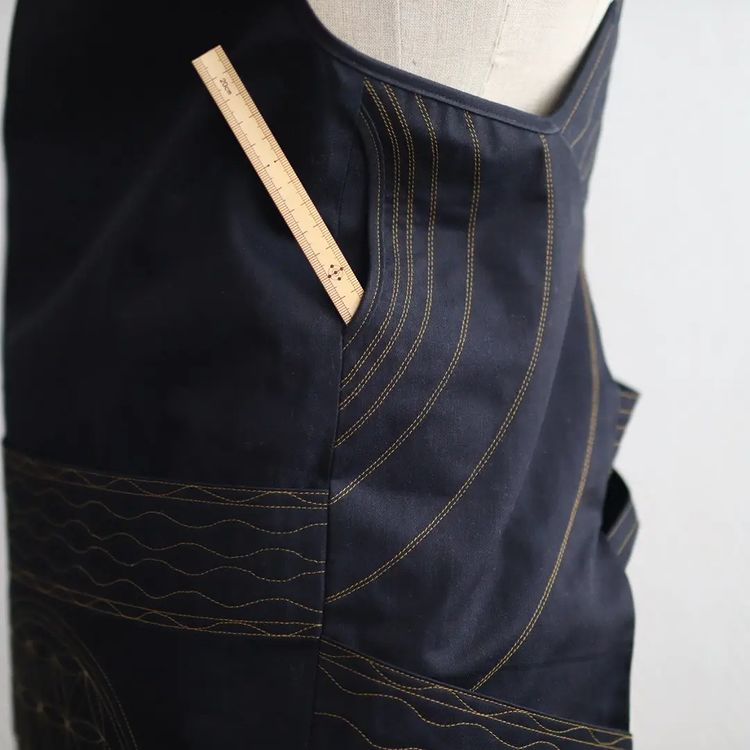
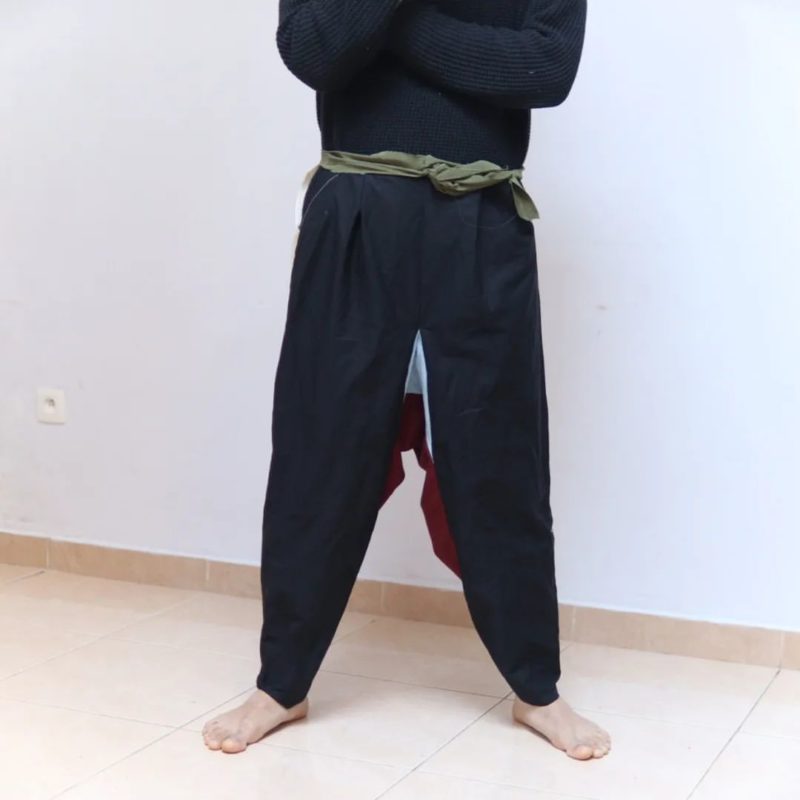
The origin of Monpe dates back to Japanese medieval time. As you can see these are quite bulky but the concept is very interesting and inspirational. We’ve already developed these pants and made 8 prototypes so far and hope we can finalise after making a couple more.

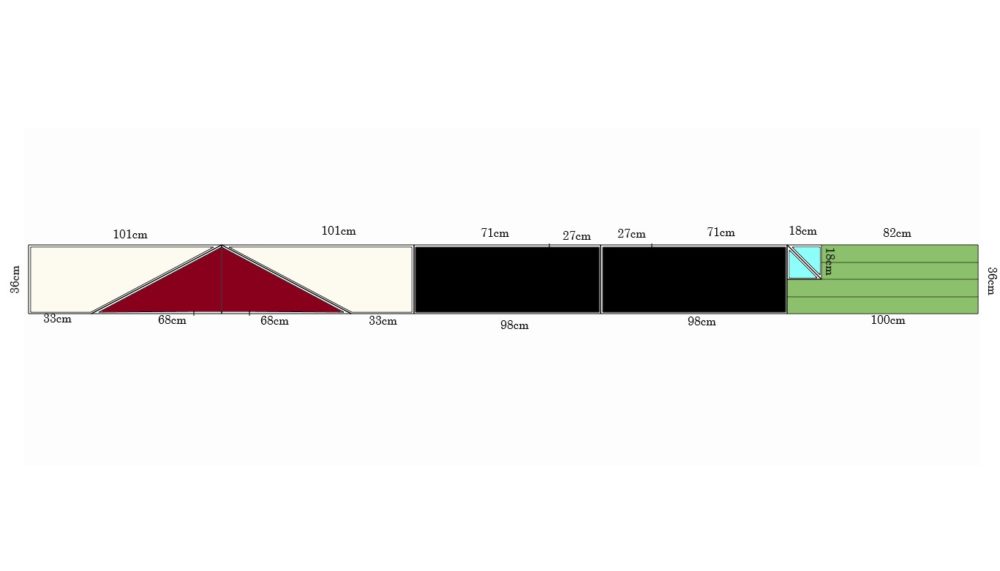
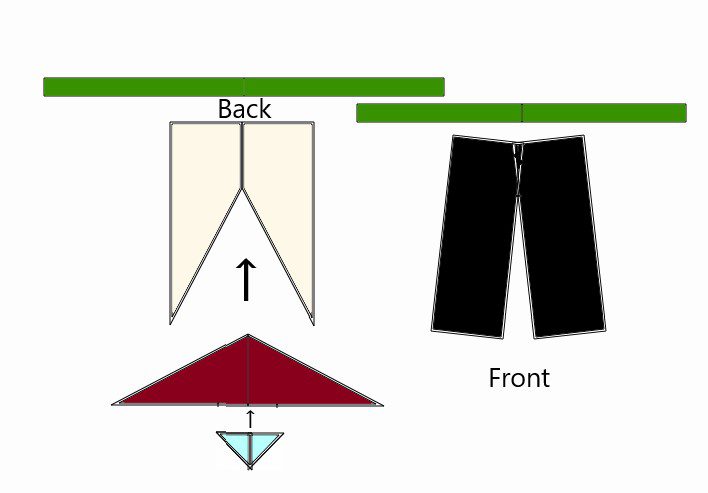
This layout is designed for a traditional Japanese fabric which width is around 34cm-36cm. Basically this is zero wastage pattern layout. I haven’t indicated any notches on these patterns apart from the end point for front rise. But it’s better to add some notches for making your sewing easier and more accurate.

NOTE :
1cm seam allowance is already included on these patterns.
There is no waist measurement (I made some tucks to fit my waist)
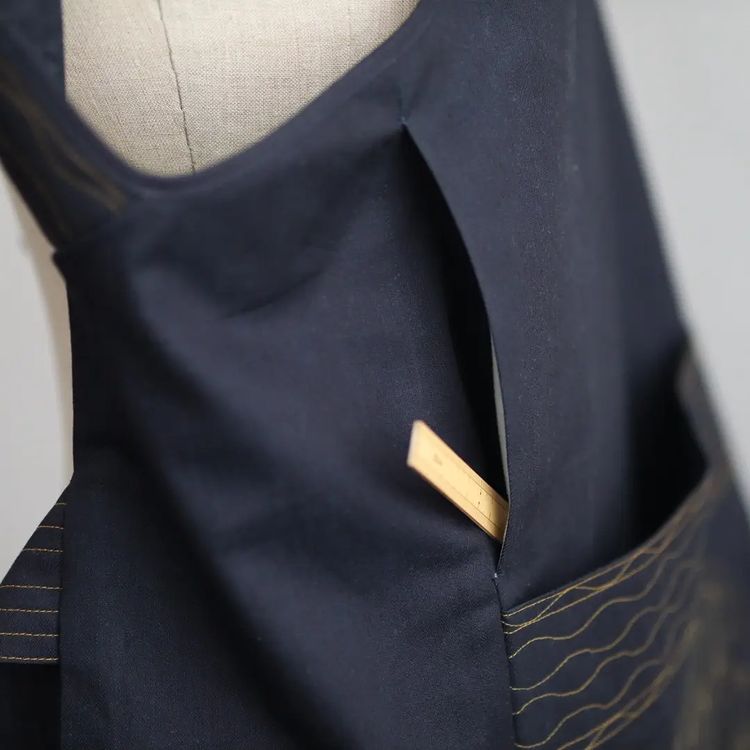
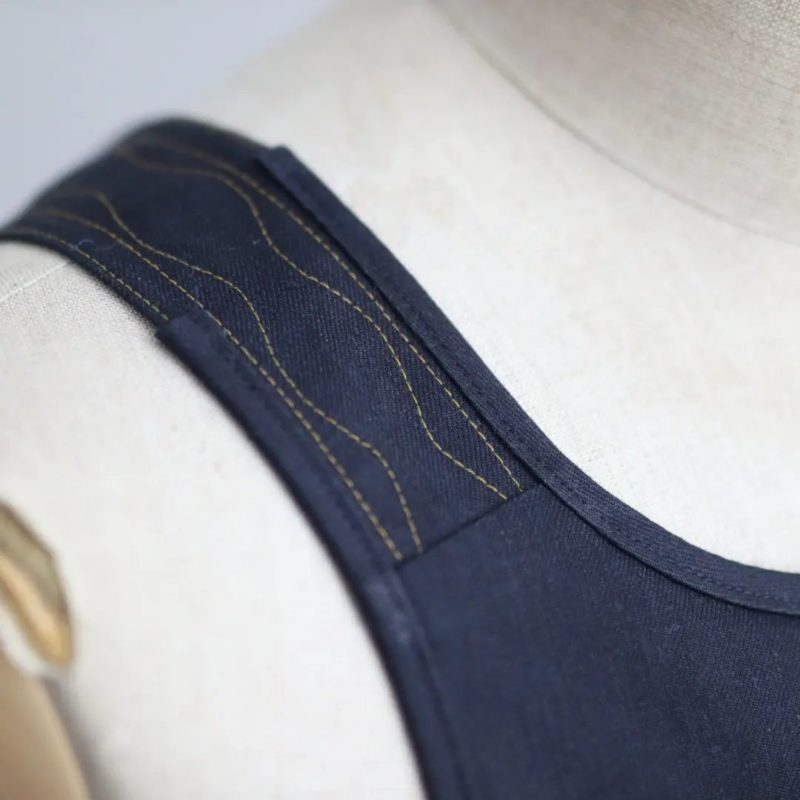
You need to make side slits. I couldn’t find any instruction for this so I just folded the side seams diagonal. The slit are quite long and wide open but old Japanese people wore very long top.

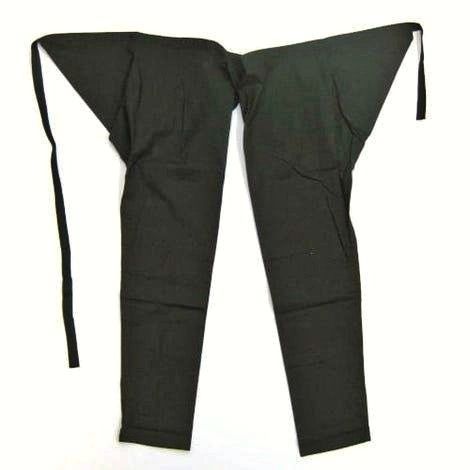
Stitching them up is quite straightforward. Hope you can work out with this very simple instruction.

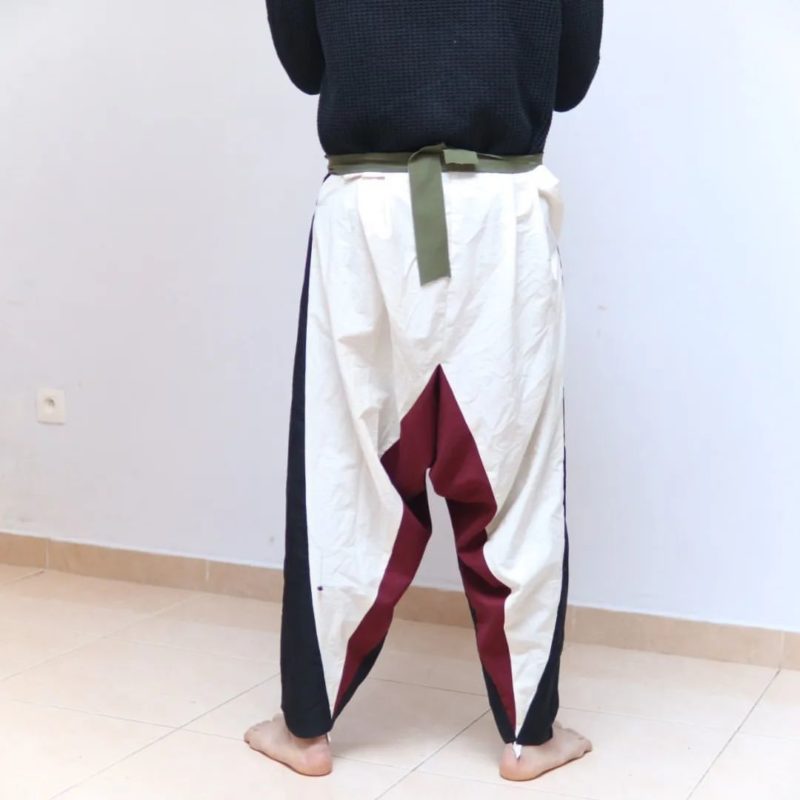
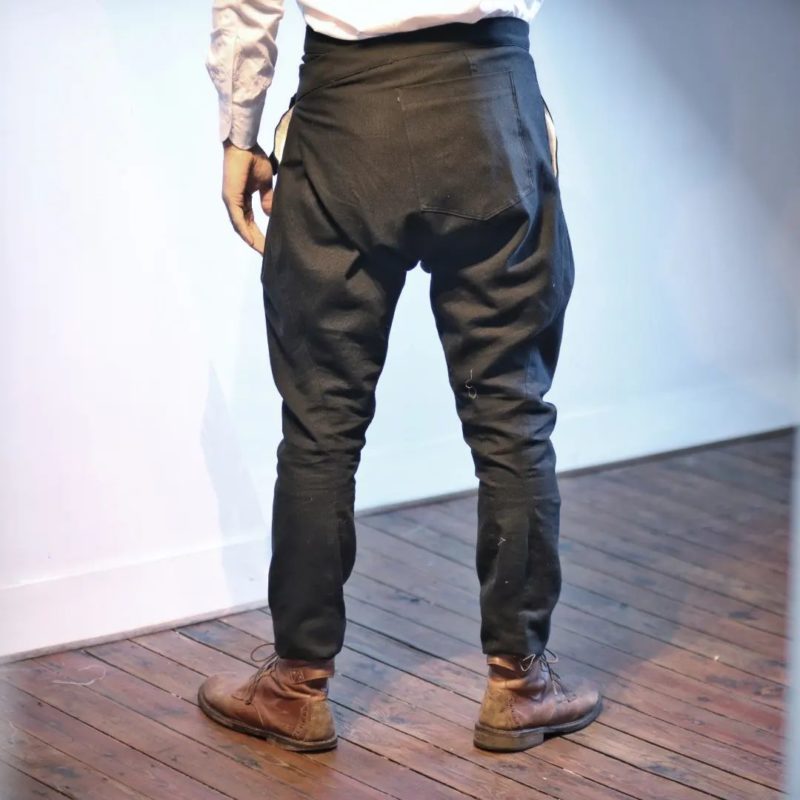
This is how they look like. Quite wide and bulky. but the construction is very inspirational. You can use this as a base pattern for your developed/ manipulated versions.

I’ve added a movie on Instagram so if interested please check it out.
https://www.instagram.com/p/CaziJvFMmRD/

Good luck!

Original Monpe pants pattern

This is the pattern layout for Karusan/Monpe pants (軽袴/もんぺ). I made this based on the textbook published by Shuji Kuramochi in 1934. The length is 530cm and the width is 37cm (as this is the standard width of Japanese traditional fabrics) Basically there is no wastage, apart from the one marked in red. It took a bit of time to figure out how I could make trousers out of this! The origin of these pants goes back to medieval times. It’s thought they were created based on trousers worn by Portuguese missionaries (calção = Shorts! lol). Initially worn by many people at that time (from Samurais to farmers), it then became more like workwear. Because they`re so comfortable/ easy to move around, they`re still quite popular in Japan as workwear. For me these patterns are very impressive and inspirational as I just got so used to modern trousers patterns.
I will make a sample based on this (hopefully tomorrow if I have time!)
Will keep you updated!

First Momohiki sample!

The first Momohiki pants prototype.
First of all I attached the front panel the other way round! Left side should be on top.
I tweeked the original pattern quite a lot. I guess it looks a bit less like nappy pants?
I attached a pocket on the back and made a fake fly.
Anyway these needs lots of developments. Will keep you updated!

We also filmed how to wear the Momohiki pants, If interested please check our Instagram post.

Click Here

Momohiki/Madabiki pants


Momohiki/Matabiki=股引き is a Japanese traditional garment dating back from the14th century and similar to western trousers. Originally they were worn by farmers,craftsmen and etc. Nowadays they’re more common during festivals and ceremonial occasions.

This textbook was written in 1880 by Genpachi Suzuki. It’s very interesting to see how the patterns are cut differently comparing to modern ones. One of the patterns is shaped as to fit the legs. Because the width of traditional Japanese fabric is about 37cm, these patterns had to be created with this limitation in mind. However, I think this limitation also creates more creativity!

I’ve created CAD patterns based on this book adding some adjustments. We will make this like the original one first, then develop it for our own workpants
Will keep you updated.

The first Haragake sample!

Haragake prototype 01

Looks like an apron but Haragake is a traditional Japanese top worn as workwear during Samurai period. This prototype was made based on the old textbook adding some adjustments. It has 5 pockets including a coin pocket. Neck and waistbands are shaped for better fit. These decorative stitches are also for reinforcement. Armhole and neck are bound to make it more secure and strong. The hem has 15cm slits so it works perfectly when you sit down.
I will try to develop this into something more modern and versatile  Will keep you updated!

Haragake – Japanese traditional workwear

This texbook was written by Mangoro Maruyama in 1886. This book features the ways of making various traditional Japanese garments. This is a Haragake (腹掛け), one of the most popular traditional Japanese workwear during Edo period, and still worn today (festive activities, performances,..) It’s shaped like an apron. It’s loved and worn by various craftmen, shopkeepers and also firefighters.
As we are working on workwear at the moment, making our own studio uniform, I created a CAD pattern based on one in this textbook.
I changed the measurements and details to meet our needs though. We will make the first toile to develop the garment. I will keep you updated how it goes!

Misuya Needle

What is Misuya needle?

The history of these needles goes back to the 11th century when the first Japanese needle was produced in Harima (Hyogo prefecture) under the name Harima Bari (Bari=Needle). When needles also started being produced by craftsmen in Kyoto in the 14th century, it’s believed that this lead to the first traditional Misuya Bari needles. In Edo era (1603-1868), Misuya Bari became so popular nationwide that the word “Misuya bari” was referred to as “Finest needle”. Although there were many craftsmen producing these special needles during this period, their number decreased significantly over the past centuries.Currently there are only 2 Misuya Bari shops left in Japan. (Third one Ogawa-Tomosaburo-Shōten closed just recently), both located in Kyoto. Our needles are from the shop Misuya Chubei founded in 1819 and the other Misuya shop is called Sanjo-Honke Misuya-bari and was founded in 1655.

What makes Misuya needle so special

– Needle as small blade – 

As these needles are crafted using the same method as making blade steel they have a very strong core. However, at the same time their body is processed in such a special way that they’re also very smooth and flexible.

– The angle – 

The point of the needle has a subtle angle, not too sharp to damage the fabric, and is designed to go through the fibre of the material more smoothly.

– Round eye VERSUS grooved oval eye – 

Our Misuya needles have two types of needle eyes: round-shaped or grooved oval-shaped. They both have their own benefits.

  • Round-shaped: These needles come with a perfect round eye which is Misuya’s unique feature. It prevents the thread from moving around too much and breaking or getting twisted.
  • Grooved oval-shaped: These needles are better for thicker threads. As the thread sits in the groove it causes less friction when going through the fabric.

Both types are polished smooth inside to prevent snapping of the thread.

(Note: You might find threading difficult if you’ve never used a needle with round eye before. It’s quite tight, but you can still use a needle threader)

– Consistency does matter – 

The thickness of the eye is slightly thinner than the body so that when you thread the needle it will be as thick as the rest of the needle, ideal for smooth handwork.

 – Lengthways polishing –

What also makes these Misuya needles special is that they’re polished lengthways instead of widthways which produces almost invisible fine lines that run in the same direction as the needle. This causes less friction and a much smoother passage when the needle goes through the fibre of the fabric.

– Every single needle by hand – 

Last but not least, every single needle is carefully inspected and wrapped by hand. The needles are wrapped in aluminium foil to prevent the build-up of humidity and to prevent the needle from rusting.

How to make a handmade reusable mask with filter pocket


This video shows you how to make a reusable mask with filter pocket.

You can print PDF pattern from the link below.

This is one of our first prototype face masks so we will update improved version once it’s ready. This is finished with binding tape so some people might find it quite difficult.. If you have any question you can email us or DM on Instagram or facebook. All the best and stay safe!

↓ ↓

Click here to open PDF face mask pattern

Stitching heavy material

Walking foot. JUKI DU1181N

Walking foot machine. JUKi – DU1181N


This juki DU1181N is an ideal machine for stitching heavy materials such as denim and leather.


[av_video src=’https://youtu.be/Q8WN0jqqK90′ mobile_image=” attachment=” attachment_size=” format=’16-9′ width=’16’ height=’9′ conditional_play=” id=” custom_class=” av_uid=’av-2526iy’]

What is walking foot machine?


The walking foot sewing machine has a special mechanism for stitching fabrics/materials, unlike a normal sewing machine which only feeds with the bottom teeth, it feeds the material with both bottom teeth and walking foot. When the material is being stitched, the bottom teeth and foot will grab and release the fabric from both sides even when the needle is out of the fabric.

This method eliminates uneven fabric stitching and reduces puckering because all layers of the fabrics are fed consistently through the machine in one fluid motion.

This machine is absolutely a game changer if you make heavy garments such as denim pants or leather jacket. Also this model is relatively inexpensive so it’s perfect as your first walking foot sewing machine!

[av_hr class=’custom’ icon_select=’yes’ icon=’ue80a’ font=’entypo-fontello’ position=’center’ shadow=’no-shadow’ height=’50’ custom_border=’av-border-fat’ custom_width=’100px’ custom_margin_top=’30px’ custom_margin_bottom=’30px’ custom_border_color=’#8c8c8c’ custom_icon_color=’#8c8c8c’ id=” custom_class=” av_uid=’av-4deubu’ admin_preview_bg=”] [av_heading heading=’- Studio Masachuka -‘ tag=’h4′ style=’blockquote modern-quote modern-centered’ subheading_active=’subheading_below’ size=’50’ av-medium-font-size-title=’50’ av-small-font-size-title=’30’ av-mini-font-size-title=’30’ subheading_size=” av-medium-font-size=” av-small-font-size=” av-mini-font-size=” color=” custom_font=” margin=” margin_sync=’true’ padding=’10’ link=’manually,https://masachuka.com/’ link_target=” id=” custom_class=” av_uid=’av-45eryi’ admin_preview_bg=”]
Power of Making
[/av_heading] [av_sidebar widget_area=’blog’ av_uid=’av-1y3mgq’] [av_masonry_gallery ids=’1441,1442,1443′ caption_elements=’none’ caption_styling=” caption_display=’always’ size=’flex’ orientation=” gap=’large’ columns=’flexible’ av-medium-columns=” av-small-columns=” av-mini-columns=” items=’3′ paginate=’none’ color=” custom_bg=” overlay_fx=” animation=’active’ container_links=’active’ id=” custom_class=” av_uid=’av-2pumyy’]


Industrial button sewing machine

button sewing machine

How to Attaching buttons by machine


[av_hr class=’custom’ icon_select=’yes’ icon=’ue80a’ font=’entypo-fontello’ position=’center’ shadow=’no-shadow’ height=’50’ custom_border=’av-border-fat’ custom_width=’100px’ custom_margin_top=’30px’ custom_margin_bottom=’30px’ custom_border_color=’#8c8c8c’ custom_icon_color=’#8c8c8c’ id=” custom_class=” av_uid=’av-4deubu’ admin_preview_bg=”] [av_heading heading=’- Studio Masachuka -‘ tag=’h4′ style=’blockquote modern-quote modern-centered’ subheading_active=’subheading_below’ size=’50’ av-medium-font-size-title=’50’ av-small-font-size-title=’30’ av-mini-font-size-title=’30’ subheading_size=” av-medium-font-size=” av-small-font-size=” av-mini-font-size=” color=” custom_font=” margin=” margin_sync=’true’ padding=’10’ link=’manually,https://masachuka.com/’ link_target=” id=” custom_class=” av_uid=’av-45eryi’ admin_preview_bg=”]
Power of Making
[/av_heading] [av_sidebar widget_area=’blog’ av_uid=’av-1y3mgq’] [av_masonry_gallery ids=’1441,1442,1443′ caption_elements=’none’ caption_styling=” caption_display=’always’ size=’flex’ orientation=” gap=’large’ columns=’flexible’ av-medium-columns=” av-small-columns=” av-mini-columns=” items=’3′ paginate=’none’ color=” custom_bg=” overlay_fx=” animation=’active’ container_links=’active’ id=” custom_class=” av_uid=’av-2pumyy’]